5 Tips for Fall Colour Photos That Pop
Every October the GTA turns gold — and every October, phone cameras full of washed-out leaf photos prove that great colour is about light and choices, not gear. Five fixes, all free:
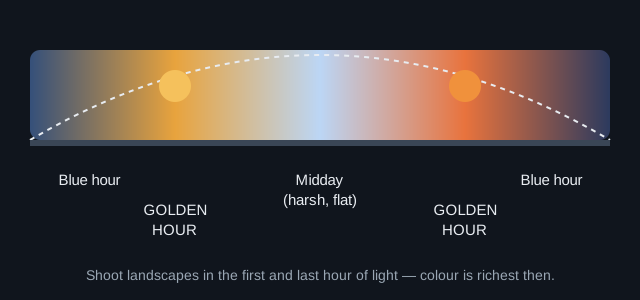
1. Chase the golden hours
Midday sun flattens reds and yellows into cardboard. The first and last hour of light does the opposite — it warms foliage and rakes across it, showing texture. If you only change one habit, change the clock.
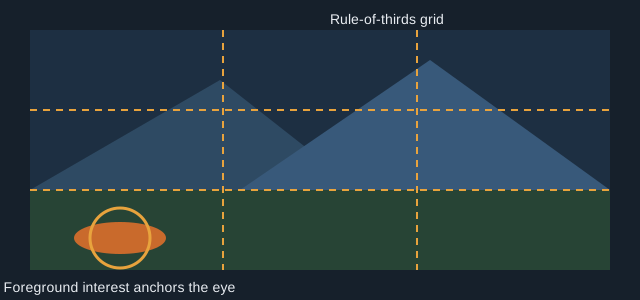
2. Give the eye an anchor
A wall of trees is a texture, not a photo. Put something in the foreground — a rock, a fence line, a path, a person — and place your horizon on a third, not in the middle. The colour becomes the backdrop; the anchor makes it a picture.
3. Shoot after rain, or under cloud
Wet leaves are saturated leaves. An overcast day works like a giant softbox: no harsh shadows, and reds and oranges glow. Some of our best fall frames were taken on grey days everyone else stayed home.
4. Underexpose a touch
Tap your subject on a phone screen and slide exposure down slightly (about -0.3 to -0.7). Cameras love to over-brighten foliage; holding a little exposure back deepens colour exactly the way your eye remembers it.
5. Warm it, don't saturate it
In editing, reach for white balance (a nudge warmer) and vibrance before the saturation slider. Vibrance lifts dull colours while protecting ones already strong — saturation just shouts everything up at once.
Illustrations are teaching diagrams drawn for this guide. The fall photos on our Instagram are the real thing.